
Ingredients
3 sponge cakes
3 ready-made fondant packs – pre coloured will save you time (2 green and 1 brown should be plenty)
Brown and Green food colours if you need to make your own colours for the fondant
Buttercream
125g unsalted butter, softened
1.5 cups icing sugar mixture
dash of milk
Cement/Glue
Sugar syrup or melted marmalade (the cement to hold the layers together)
Tools
Firm board for the base of the cake – either make it or buy one from a specialty shop
Larger board for displaying the cake
fondant smoother – a must!
Cake spatular
Method
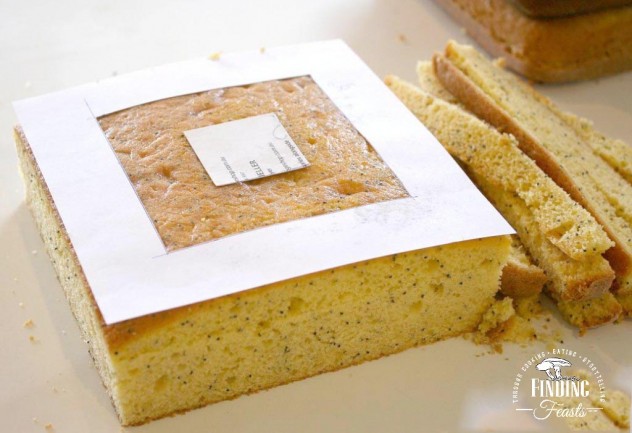
Firstly you need to make a template.
I did this part a little wrong… I measured the height of the cake and then divided it by three and then measured a square on top and divided that by three but they weren’t the same measurements so the checkered sections weren’t squares but closer to rectangles… Not too noticeable though…
What you should do is measure the smaller side – either the height or the width of the sponge – and use that as your master measurement, so if the height measures 12cm high and the width is 15cm then aim to have all you measurements based on the 12cms. That will make 4cm sections as we are doing 3 layers.
Once you have your dimensions, cut out the template out of paper.
If you are making your base for the cake, get that ready now. Get some very firm cardboard and cover it with foil. Make it the same size as the cake so you don’t see it once finished.
Get your ‘cement’ ready by either making up some sugar syrup (1 part white sugar 2 parts water, heat till sugar has dissolved) or heating up some marmalade so it’s more liquid than jelly
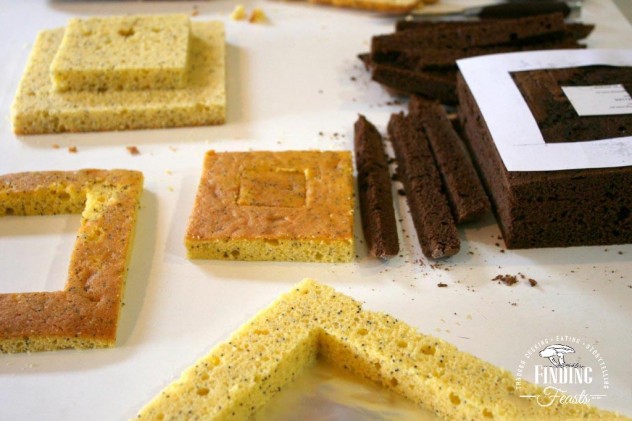
Cut each of your sponges, firstly by slicing three even layers through the cake to end up with three sections. Best to use some kind of gauge like resting your knife on something that’s the same height as what your measurement is so you don’t go off course. Do it slowly and carefully.
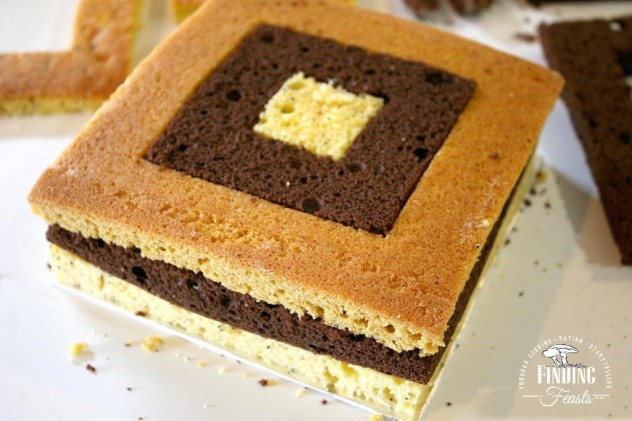
Secondly, lay the template on top of the sponge and cut around the sides and the centre sections.
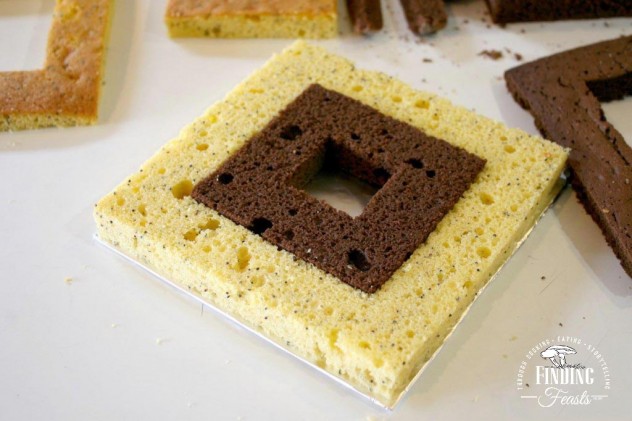
Lay the first of an outside section onto your board (you can see mine under the front sponge – I made mine, just firm board and foil)
Brush with the ‘cement’ as you go – each side that is about to be touching another section.
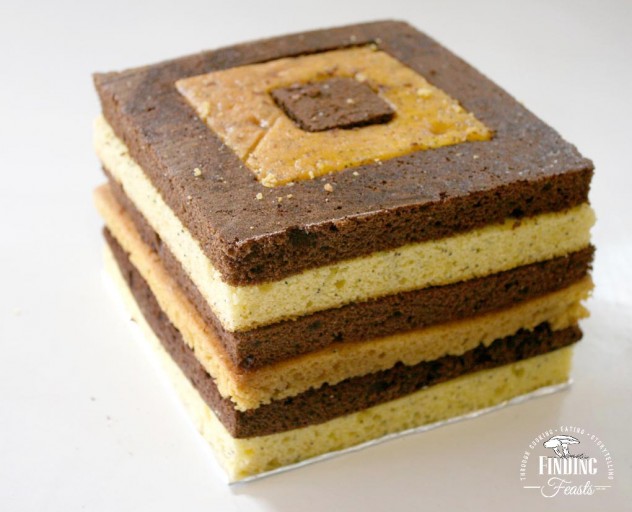
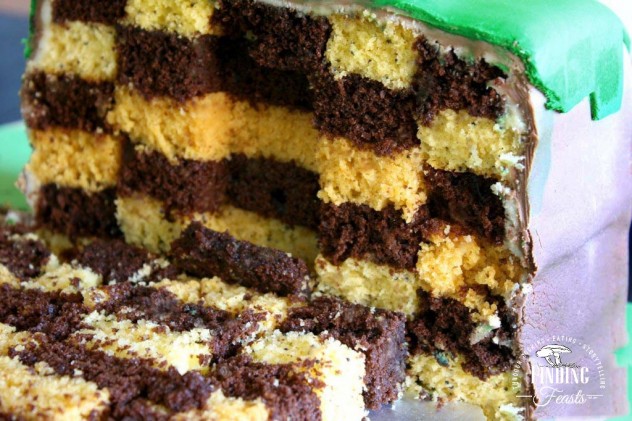
Alternate the different colours making sure that no one colour is next to or on top of it’s self
Brush with the ‘cement’ as you go and keep build up
till the final piece is added.
Make the buttercream icing by beating the softened butter with an electric mixer till pale and then gradually adding the icing sugar, add a tiny dash of milk if it’s too thick
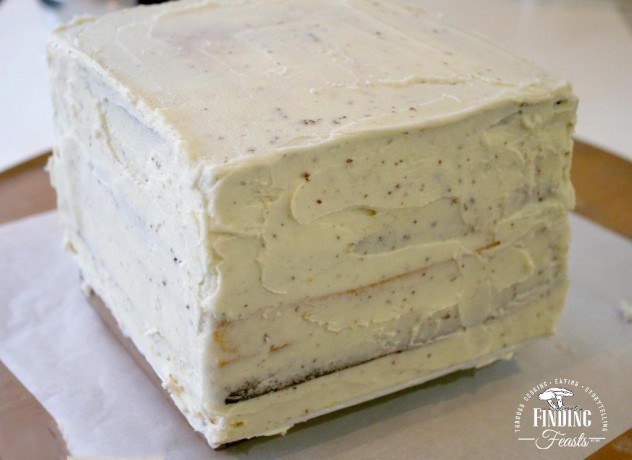
Cover the entire cake with buttercream icing, smoothing out with a cake spatular
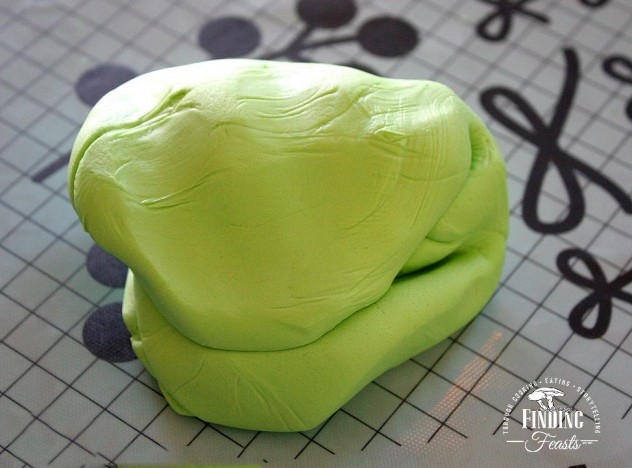
Knead the fondant to soften it and make it pliable, add colour if you need to. This is my experiment as I didn’t have powder colour, I thought if I let the liquid green dry a bit prior to working it in to the fondant then the fondant wouldn’t get too soft… it seemed to work beautifully so I recommend this way if you need to.

Knead it till the colour is uniform and then cover with cling film to stop it drying out
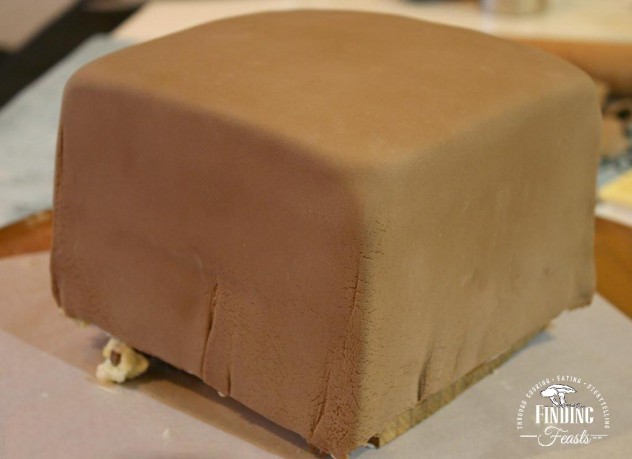
Roll out the brown fondant (or do as above) to the size required to cover the cake entirely.
This is where cake makers earn their badges as you need to place the fondant over the top then skilfully work it so the fondant sucks in on itself. This is no easy feat as you can see from my attempt. At this point I could turn it into an elephant’s foot, but I push on…
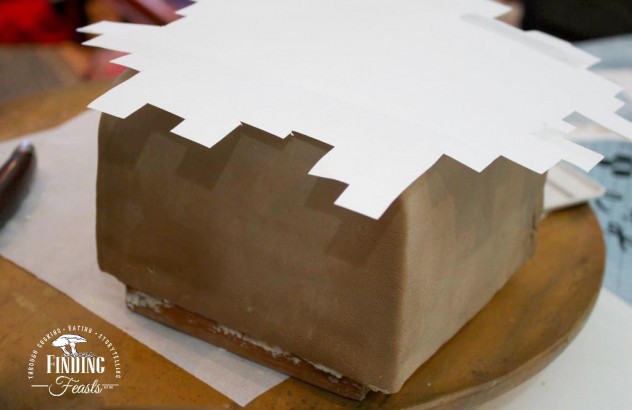
Cut out another template for the grass
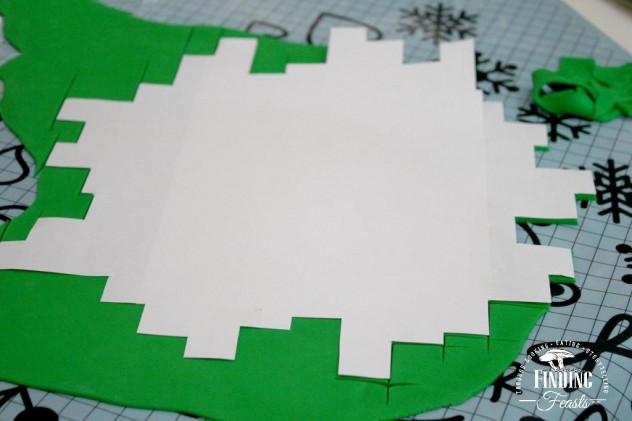
Roll out the green fondant and cut out the grass using your template.
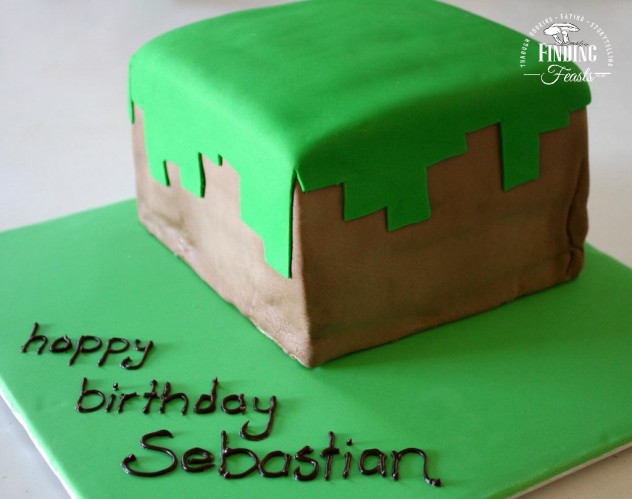
Roll out the rest of the green to lay as a base. This is for the final display
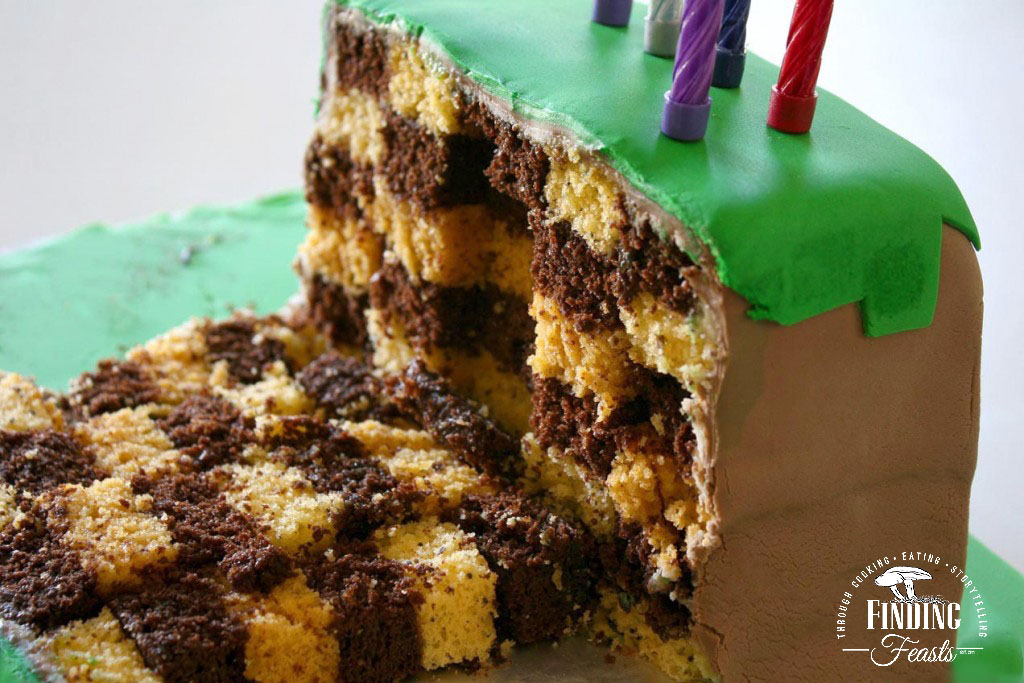
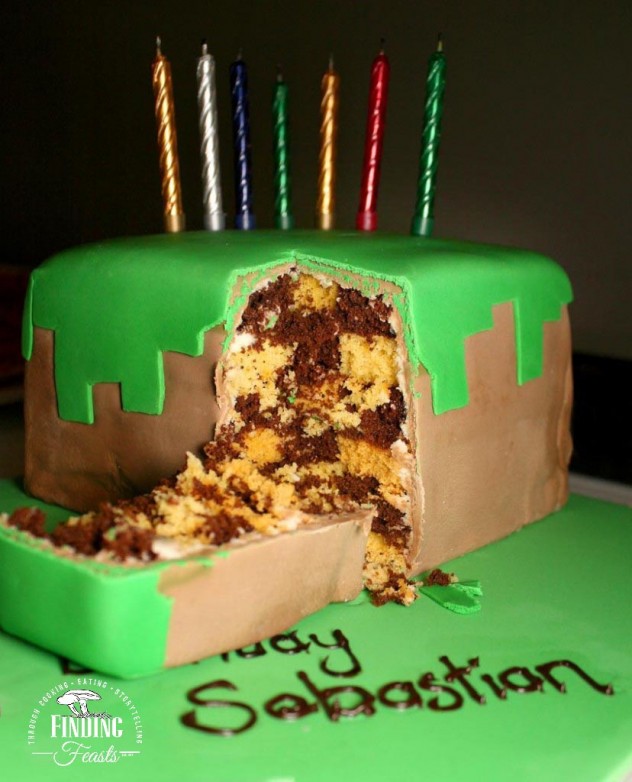
Voila! A Minecraft Birthday cake.


- 3 sponge cakes
- 3 ready-made fondant packs - pre coloured will save you time (2 green and 1 brown should be plenty)
- Brown and Green food colours if you need to make your own colours for the fondant
- 125g unsalted butter, softened
- 1.5 cups icing sugar mixture
- dash of milk
- Sugar syrup or melted marmalade (the cement to hold the layers together)
- Firm board for the base of the cake - either make it or buy one from a specialty shop
- Larger board for displaying the cake
- fondant smoother - a must!
- Cake spatular
- Firstly you need to make a template. Measure the smaller side - either the height or the width of the sponge - and use that as your master measurement, so if the height measures 12cm high and the width is 15cm then aim to have all you measurements based on the 12cms. That will make 4cm sections as we are doing 3 layers.
- Once you have your dimensions, cut out the template out of paper.
- If you are making your base for the cake, get that ready now. Get some very firm cardboard and cover it with foil. Make it the same size as the cake so you don't see it once finished.
- Get your 'cement' ready by either making up some sugar syrup (1 part white sugar 2 parts water, heat till sugar has dissolved) or heating up some marmalade so it's more liquid than jelly
- Cut each of your sponges, firstly by slicing three even layers through the cake to end up with three sections. Best to use some kind of gauge like resting your knife on something that’s the same height as what your measurement is so you don’t go off course. Do it slowly and carefully.
- Secondly, lay the template on top of the sponge and cut around the sides and the centre sections.
- Lay the first of an outside section onto your board (you can see mine under the front sponge - I made mine, just firm board and foil)
- Brush with the ‘cement’ as you go – each side that is about to be touching another section.
- Alternate the different colours making sure that no one colour is next to or on top of it’s self
- Brush with the ‘cement’ as you go and keep build up till the final piece is added.
- Make the buttercream icing by beating the softened butter with an electric mixer till pale and then gradually adding the icing sugar, add a tiny dash of milk if it’s too thick
- Cover the entire cake with buttercream icing, smoothing out with a cake spatular
- Knead the fondant to soften it and make it pliable, add colour if you need to. This is my experiment as I didn’t have powder colour, I thought if I let the liquid green dry a bit prior to working it in to the fondant then the fondant wouldn’t get too soft… it seemed to work beautifully so I recommend this way if you need to.
- Knead it till the colour is uniform and then cover with cling film to stop it drying out
- Roll out the brown fondant (or do as above) to the size required to cover the cake entirely.
- This is where cake makers earn their badges as you need to place the fondant over the top then skilfully work it so the fondant sucks in on itself. This is no easy feat as you can see from my attempt. At this point I could turn it into an elephant’s foot, but I push on…
- Cut out another template for the grass
- Roll out the green fondant and cut out the grass using your template.
- Roll out the rest of the green to lay as a base. This is for the final display
- Voila! A Minecraft Birthday cake.
[…] Checkered Dirt Block Minecraft Cake A fabulous cake made of sponge cakes, fondant, buttercream, icing, and sugar syrup, that will let you be creative with ready-made or homemade ingredients. See the Recipe […]