

This is the same pizza dough from my previous post.
This needs to be made at least a full day ahead, ideally 2 days or so.
Ingredients
250g plain flour
250g strong flour
1.5 tsp salt
1 tsp dry yeast
1 tbs oil
325 ml warm water
1 tbs ghee, melted
Method
Place the flours, salt, yeast and oil into a large bowl.
Slowly pour in the warm water and stir in with a butter knife till just combined.
Start kneading and only add more water as it’s needed. Knead for 10 mins
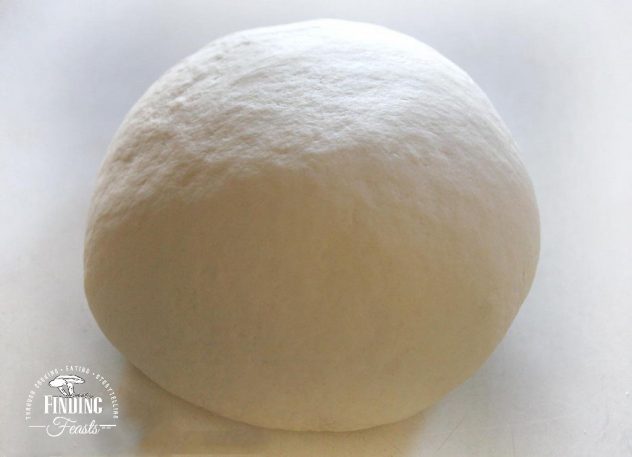
Place in a bowl, cover with cling film and let rest till double the size.
*After this rest you can either use all of the dough for roti or divide in half and use half for the roti and the other half for pizza – keeps in the fridge for weeks
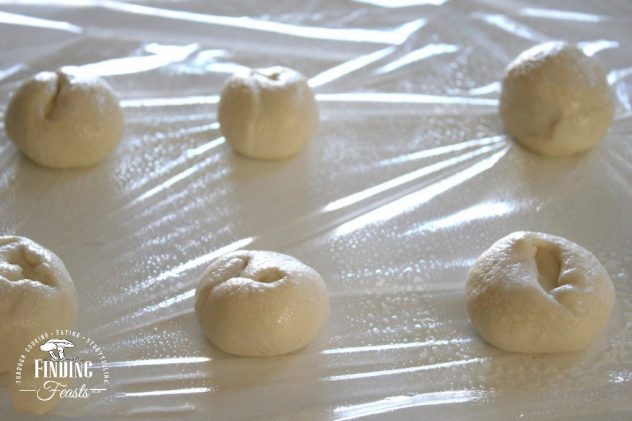
With your portion of dough, give it a little knead – just to knock the air out, and cut into equal parts. I made 8 golf ball size rounds, which makes a great entree size but you could make them as big as you want. Place these on a tray with cling film, spray with oil and cover with cling film. Place in the fridge for at least a day to rest.
Remove from the fridge and let them sit for an hour
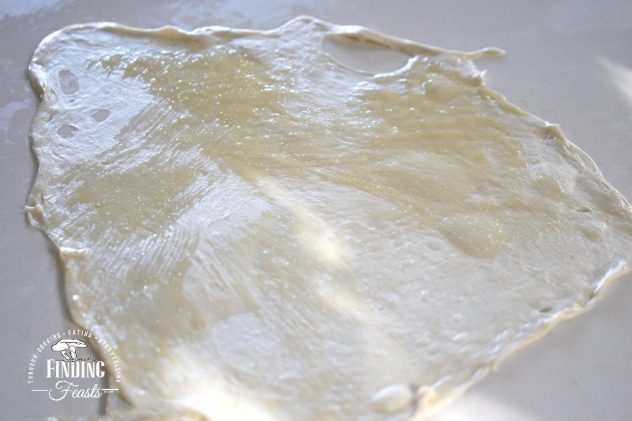
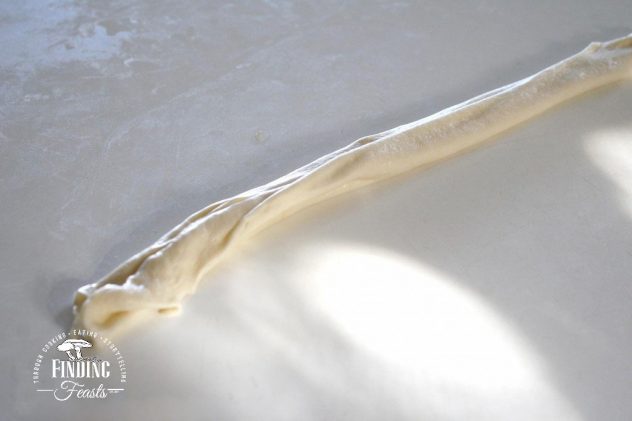
Rub a little oil on your work bench and squash down the dough with the ball of your hand. The dough is now extraordinarily soft and pliable, it is like working with nothing you have worked with before. Flatten the dough and with a little oil, pick up the edges and pull out, stretching it till it’s super thin. Don’t worry about holes.
Brush with melted ghee.
Fold over one side to the centre. Try and trap air in the fold if you can.
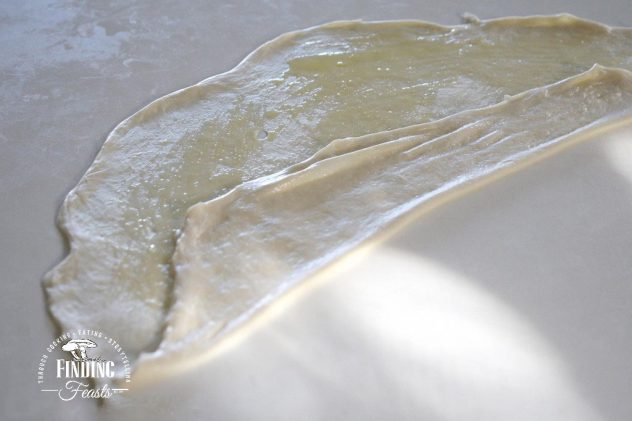
Fold over the other side, you don’t need to be exact.
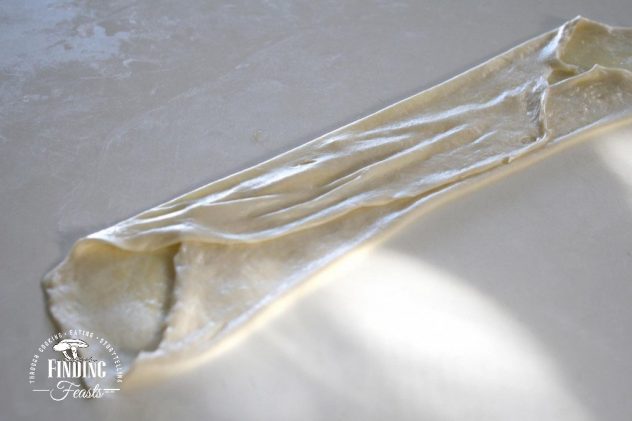
Then repeat. You will have a slender stick of dough.
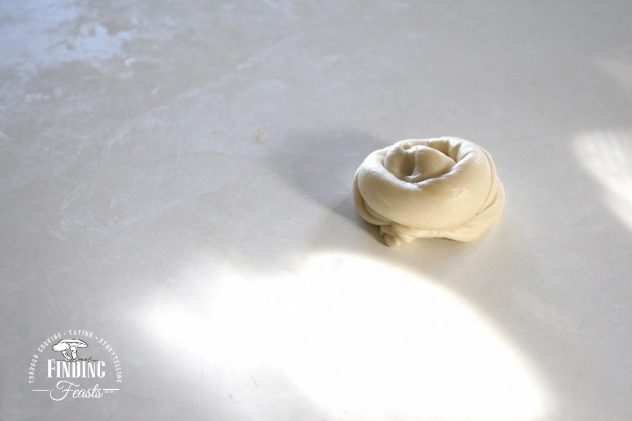
Pick up one end and wind it back on it’s self so you end up with a scroll. Press the end of the dough under the scroll.
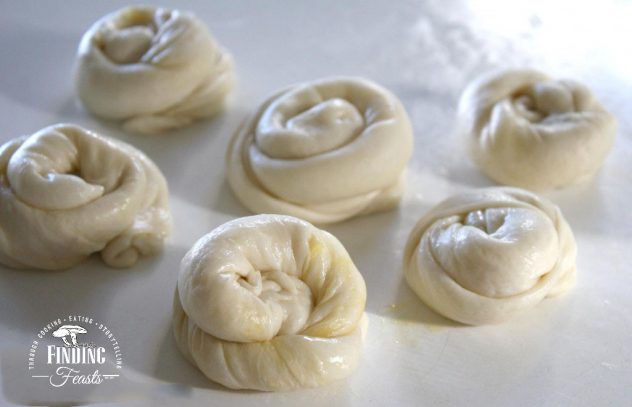
Do all your rotis and let sit for 15mins.
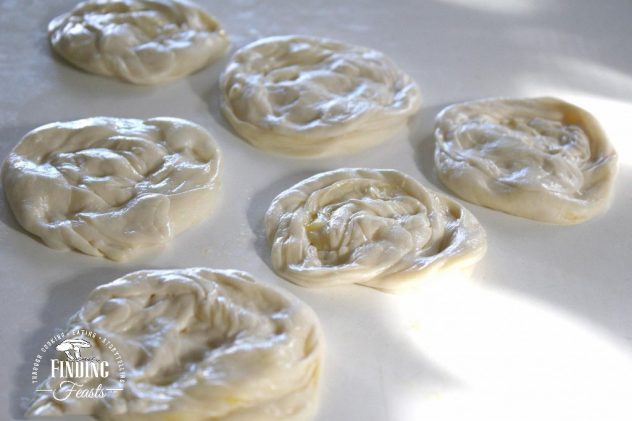
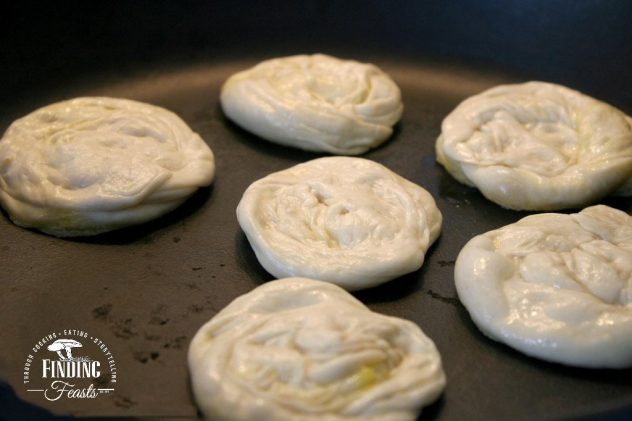
With your fingers, squash the roti balls down, you can make these quite thin if you like.
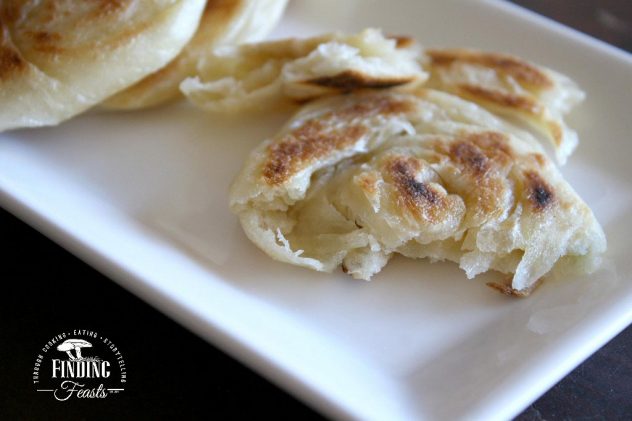
In an un-oiled low to medium heat, heavy based pan, place the rotis.
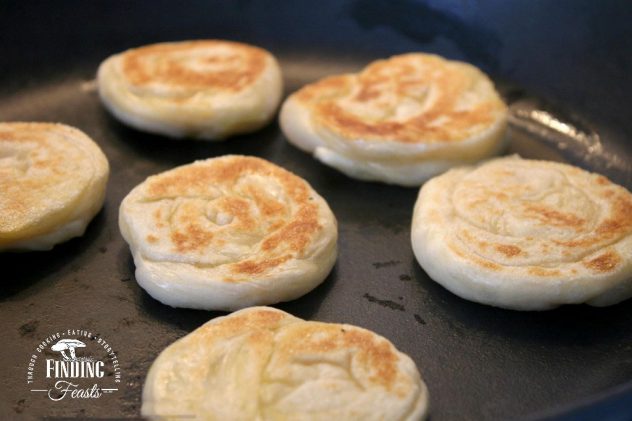
Cook for about 2.5 mins on either side.
If you wanted to you can make rectangle shaped ones also, these can hold a filling.

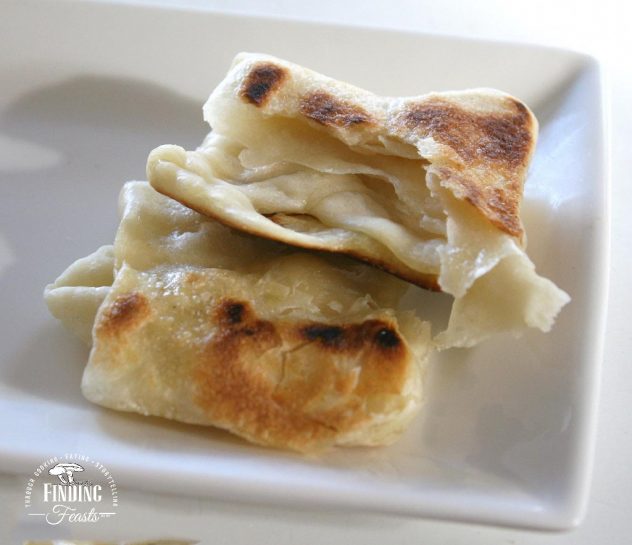
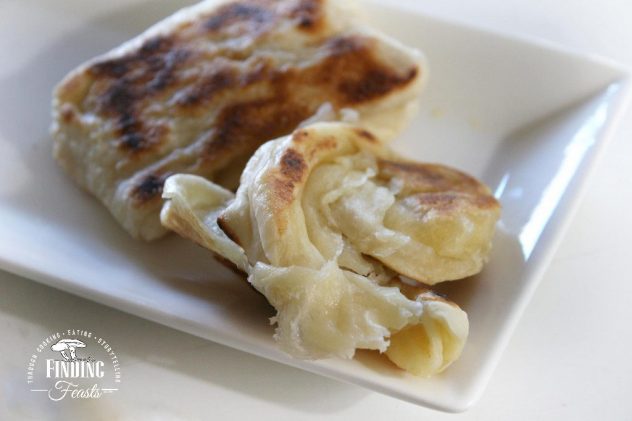
Fabulous!
Posted 12th May 2014
This is insanely good Roti Canai using my ‘Best Ever Pizza Dough Recipe’ – That’s right, pizza dough for roti!
I knew this dough was good but I am truly surprised at how adaptable it really is. I generally have a portion of this dough in the fridge at any given moment – Seb loves a pizza, but it was only when I went to use it after it had been there for a few days that I realised just how supple it had become…
While the Finding Feasts gal’s were taking a short break with the families in Kangaroo Valley, I chose to try my hand at roti. The dough was amazingly supple and had an incredible stretch but the end result wasn’t too great. But I will never forget the feel and texture of that dough.
When I came across this similar texture in the pizza dough my first thought was the roti dough, which is why we are now here!
What makes this just so amazing is that you have a dough that has so many uses. You don’t feel like you are making an effort for a dish that you will only make once or twice, you will be able to make it whenever you want knowing that some of it can go to making pizza bases or flat bread.
I made two styles of this, one is the circular one and the other is a rectangular one. The rectangular shaped one can also have a filling of your choice,
Roti is alot of fun to make and if you are so inclined you could use the proper technique of flipping – that will be my next challenge!

- 250g plain flour
- 250g strong flour
- 1.5 tsp salt
- 1 tsp dry yeast
- 1 tbs oil
- 325 ml warm water
- 1 tbs ghee, melted
- Place the flours, salt, yeast and oil into a large bowl.
- Slowly pour in the warm water and stir in with a butter knife till just combined.
- Start kneading and only add more water as it’s needed. Knead for 10 mins
- Place in a bowl, cover with cling film and let rest till double the size.
- With your portion of dough, give it a little knead – just to knock the air out, and cut into equal parts. I made 8 golf ball size rounds, which makes a great entree size but you could make them as big as you want. Place these on a tray with cling film, spray with oil and cover with cling film. Place in the fridge for at least a day to rest.
- Remove from the fridge and let them sit for an hour.

- Rub a little oil on your work bench and squash down the dough with the ball of your hand. The dough is now extraordinarily soft and pliable, it is like working with nothing you have worked with before. Flatten the dough and with a little oil, pick up the edges and pull out, stretching it till it’s super thin. Don’t worry about holes.
- Brush with melted ghee

- Fold over one side to the centre. Try and trap air in the fold if you can

- Fold over the other side, you don’t need to be exact

- Then repeat. You will have a slender stick of dough

- Pick up one end and wind it back on it’s self so you end up with a scroll. Press the end of the dough under the scroll

- Do all your rotis and let sit for 15mins

- With your fingers, squash the roti balls down, you can make these quite thin if you like

- In an un-oiled low to medium heat, heavy based pan, place the rotis

- Cook for about 2.5 mins on either side

- Now they are ready to eat!


